


The “old world” of IT operations used to entail high maintenace effort, costly downtimes, vendor lock-in, and developers waiting for their tickets to be processed. Enter: Kubermatic Kubernetes Platform. We saw the need for IT operations to be automated and infrastructure to be more scalable and flexible.
The speed at which enterprises need to digitize and scale cannot be done manually anymore. The “new world” of IT operations brought on by Kubernetes and cloud native technologies enables companies to have an automated, self-service platform that allows continuous freedom of choice and self-healing infrastructure. The platform can reconcile on its own without the need for manual intervention allowing IT operations to scale through software rather than people.
How Does Kubermatic Kubernetes Platform Work?
Kubermatic Kubernetes Platform is a unified solution for automated cloud native operations creating an enterprise-grade self-service platform. It enables organizations to automate Kubernetes multi cluster lifecycle management with built in security and governance.
The key to this automation is our “Kubernetes in Kubernetes” architecture. The core of Kubernetes is just a reconciliation loop that allows users to specify the state of the world they require. The system will check if there is a difference between the declared and actual state and if there is, it will automatically make the changes to bring them in alignment. Kubermatic Kubernetes Platform extends this paradigm beyond just pods to also automate the Kubernetes cluster lifecycle itself.
This allows the whole stack to run on Kubernetes. As an operator, there are three main benefits:
- The management footprint and cost are shrunk 5x - containerizing the control plane provides the density required to run at scale
- Resiliency - a self-healing infrastructure reduces the meantime to recovery when things go wrong
- Automation of operations allows scaling through software rather than people
Overall, Kubermatic Kubernetes Platform provides a single pane of glass to manage your complete Kubernetes infrastructure including hybrid, multi-cloud, and edge deployments.
What Does It Take to Get Started with Kubermatic Kubernetes Platform?
Kubermatic Kubernetes Platform features streamlined tools to manage teams and projects, create clusters, and manage clusters. The steps below will demonstrate how to set up these functions for any new user.
Manage a Project and Users
Step 1: To start the process, after you log in to Kubermatic, you will be greeted with the list of all projects you created or have been given access to. When first using Kubermatic, the list will be empty and you will need to create your first project.
Click on the button in the top right to create your first project. Give it a descriptive name and click “Save”. After a short moment, your project will be ready.

Step 2: To manage clusters, you need to select which project you would like to work in by either clicking the project in the project list or by using the dropdown in the top-left corner.
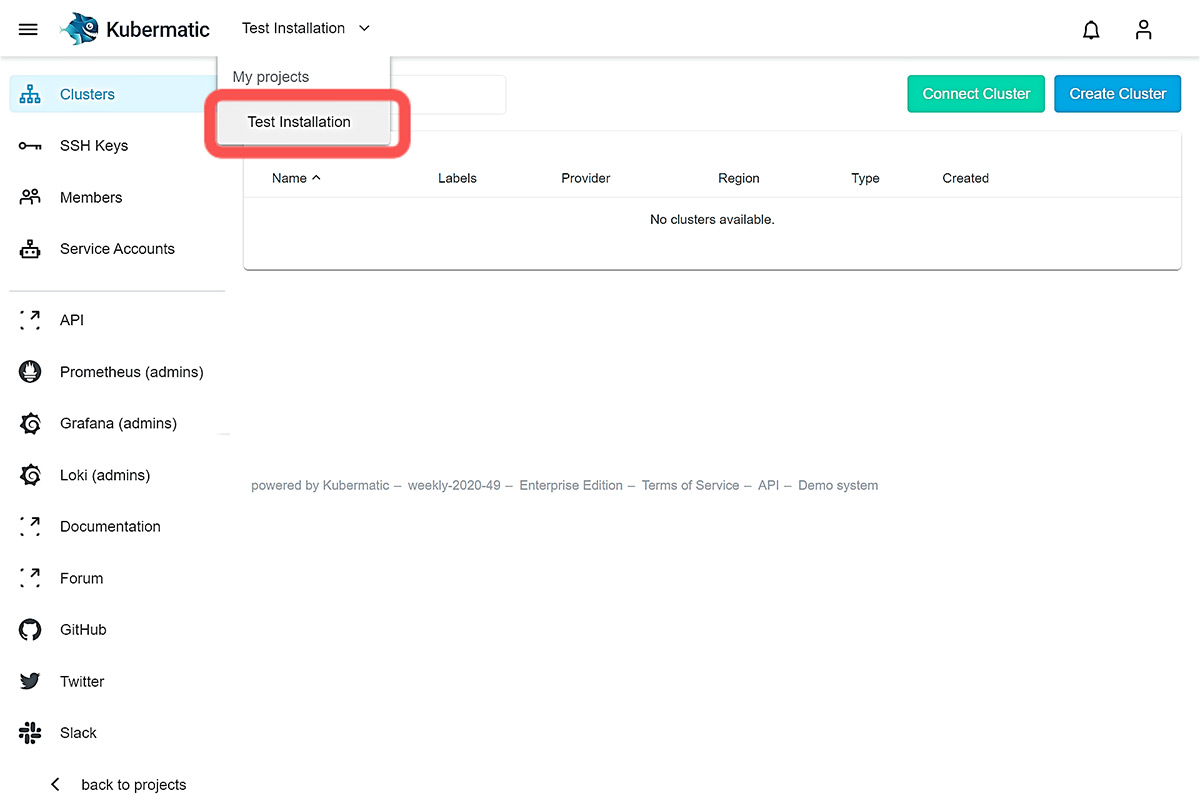
After selecting the current project, the menu items for managing clusters, members, and service accounts become active.
Step 3: After selecting a project, click on “Members” in the menu to see the list of active members. If you are the owner, you can add and remove members of your project. To add a member, just like adding a project or a cluster, use the button above the member list. Add the email address of an existing user and define their role in the project.
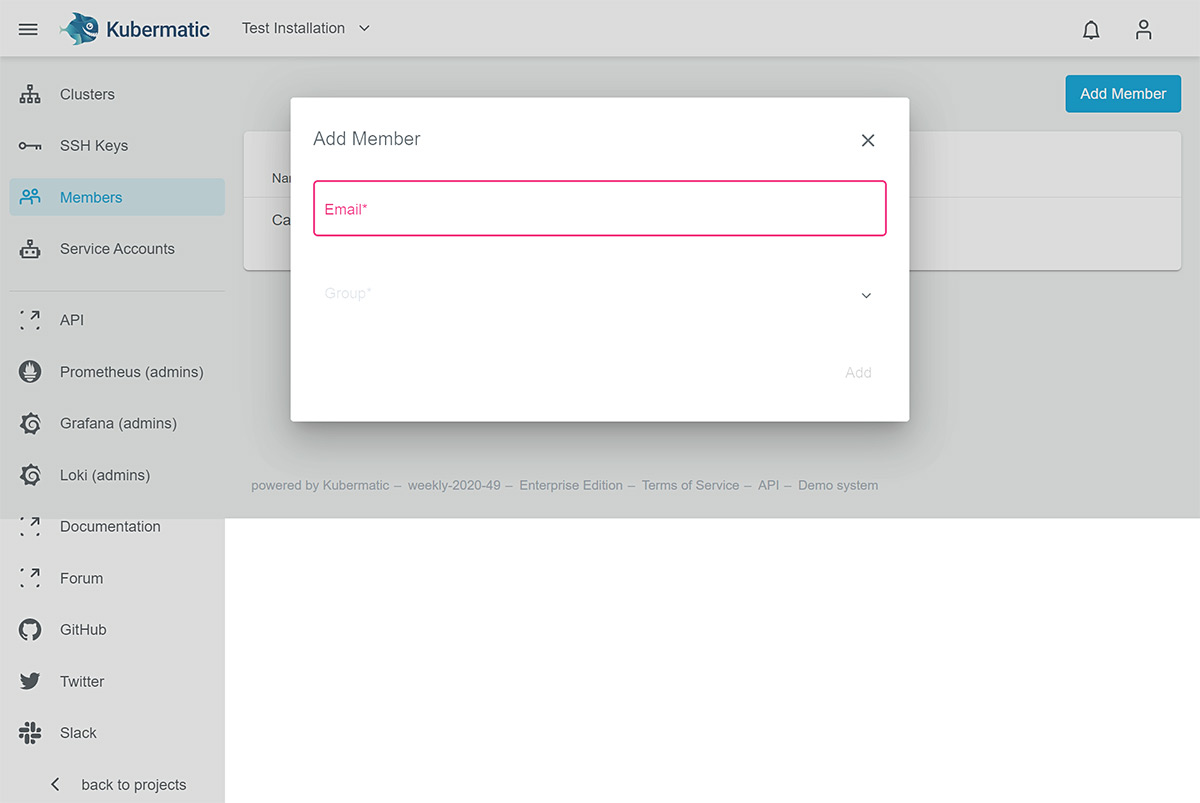
Owners have complete control over the project and can manage permissions. Editors have write access to your project and can manage clusters, nodes, and SSH keys. Viewers have read-only access and can only view the existing resources. You can change the role of a user or remove them altogether at any time. After adding a user to a project, the project will immediately show up in the user’s project list.
Step 4: After selecting a project, click on “Service Accounts” in the menu to see the list of active service accounts. Similar to adding members, owners can add and remove service accounts and manage tokens that belong to them as well. To add a service account, use the button above the service account list to add the name and assign a group.
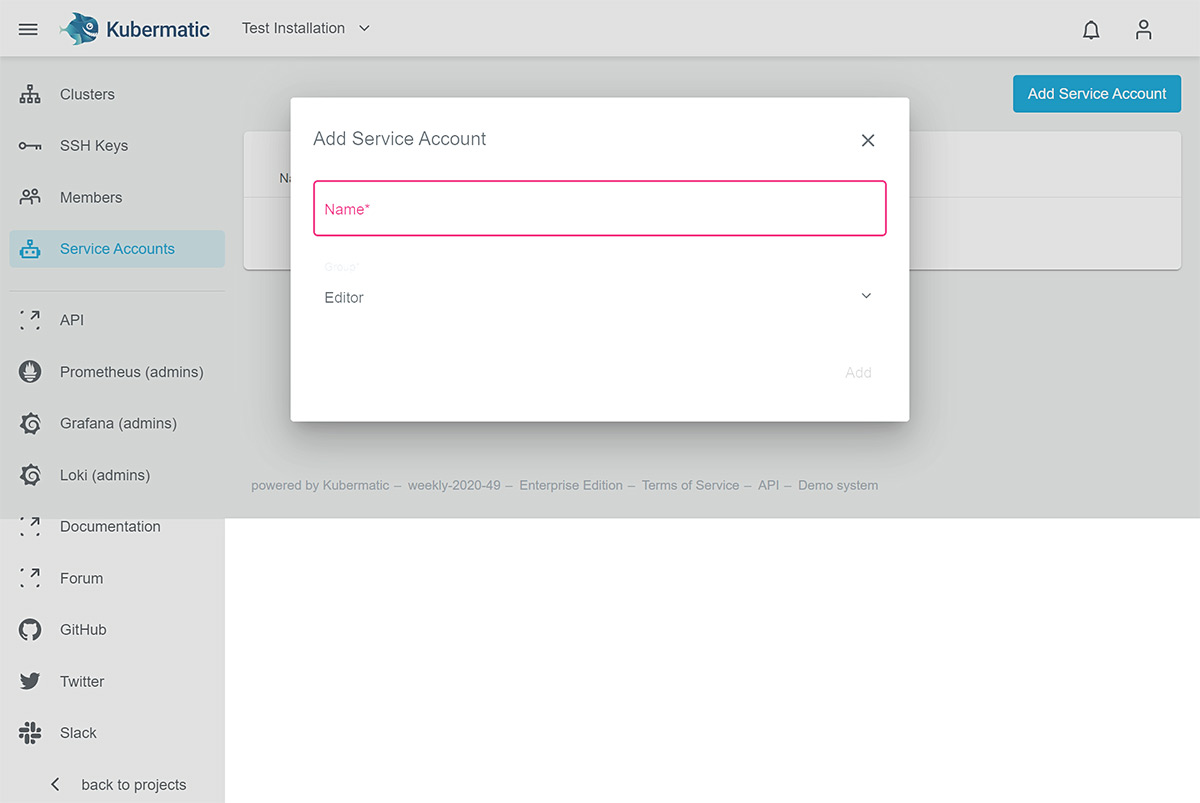
Editors and viewers have the same capabilities as members outlined in Step 3. You can change the role for a service account or remove them altogether at any time.
Create a Cluster
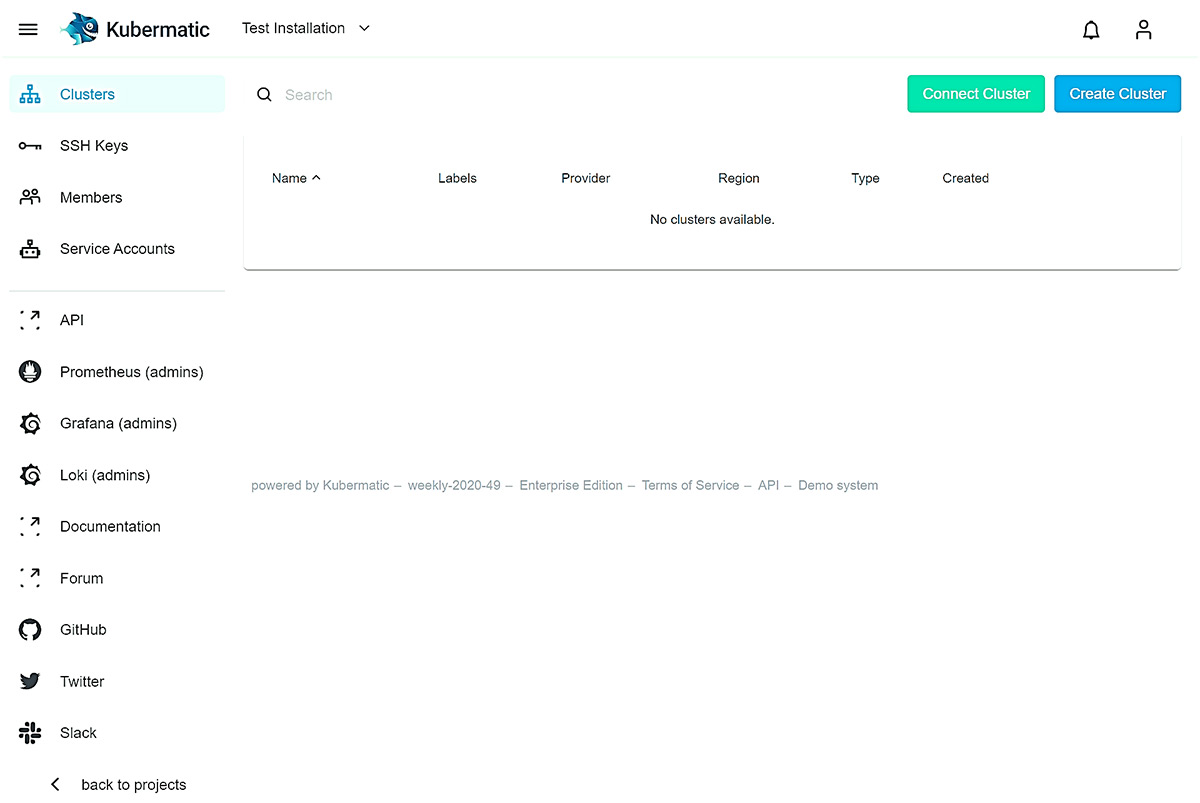
Step 1: Before you can manage clusters or SSH keys, select your current project. After choosing the project, the relevant menu items will become active.
You can go to the clusters view by clicking on “Clusters” and then on the “Add Cluster” button in the top right corner to access the cluster wizard.
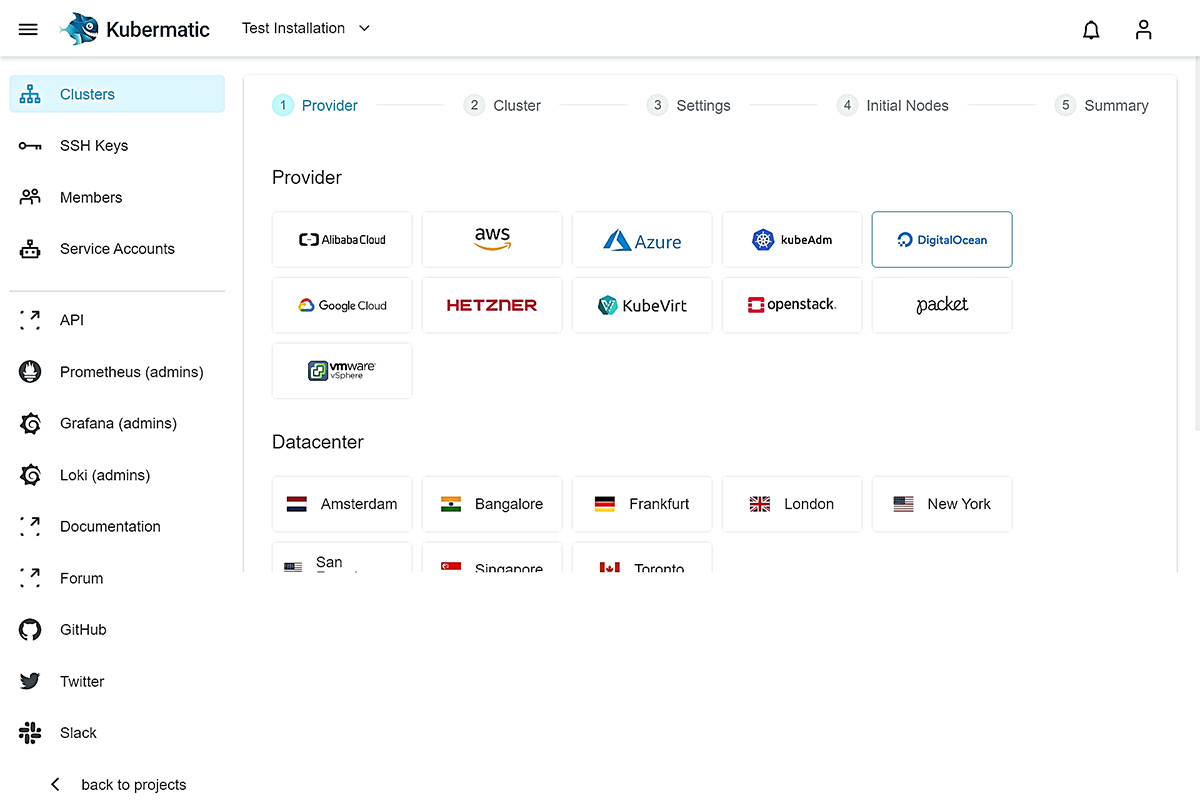
Step 2: Choose a cloud provider and datacenter for your Kubernetes nodes to be deployed by Kubermatic Kubernetes Platform. Your nodes can be placed in any cloud allowed by your operations team.
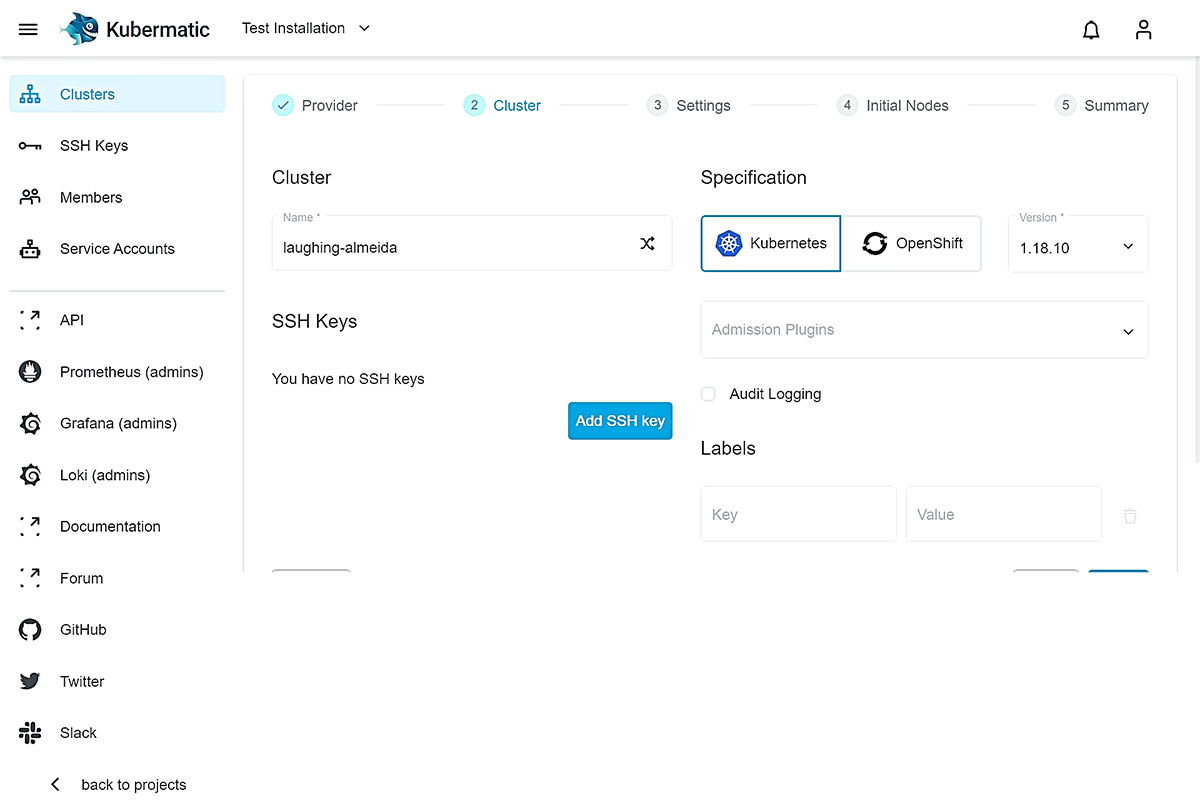
Step 3: Next, you specify the cluster name which is how you will identify your Kubernetes cluster instance. Choose a name that is easy for you to remember and select your desired Kubernetes version.
Step 4: Enter your provider-specific credentials so that Kubermatic Kubernetes Platform can configure your worker machines and integrate them into your cluster. This step varies depending on the selected provider; you will be asked for different provider credentials when choosing AWS or Google, for example.

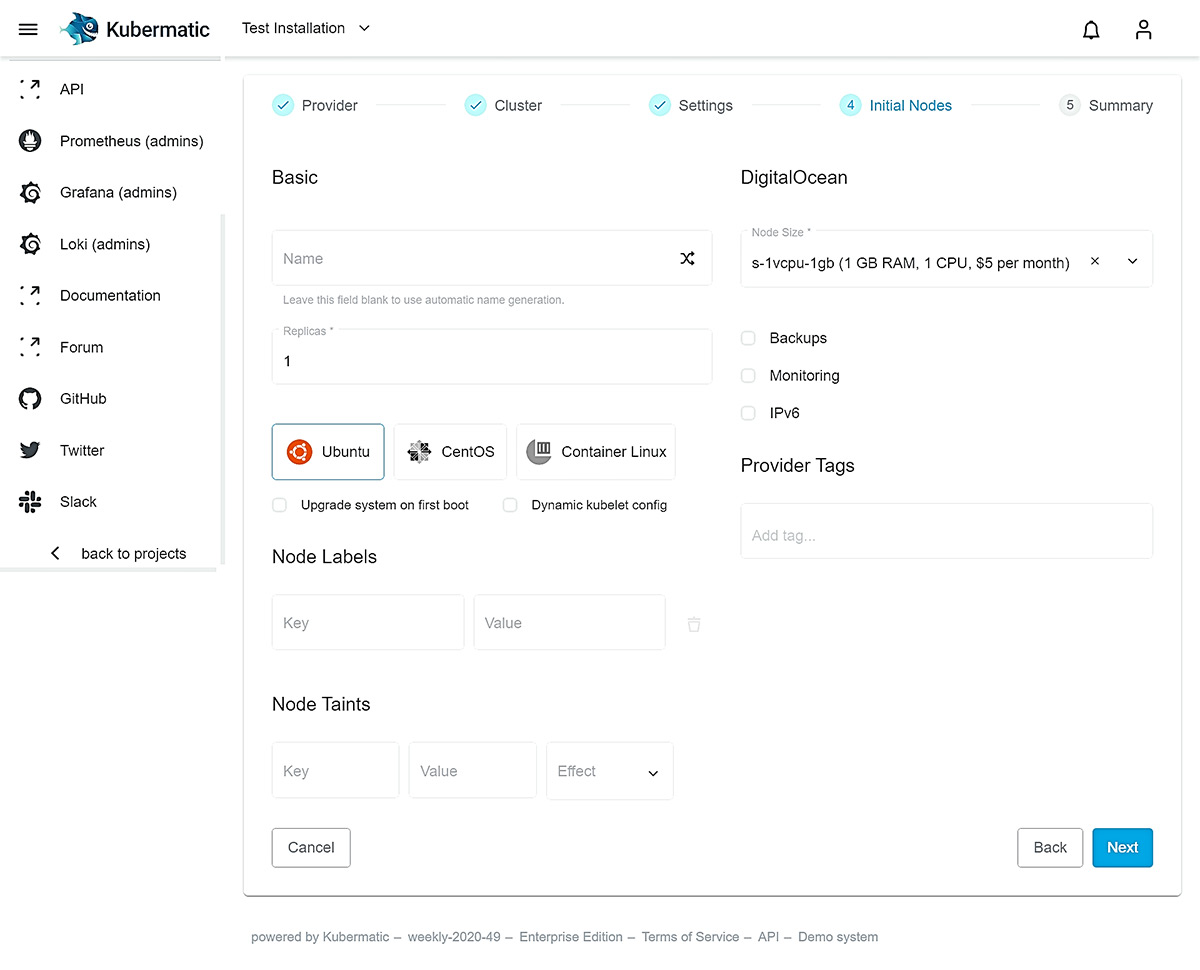
Step 5: Finally, choose the number of nodes, operating system, and type of instances you will have for worker nodes.
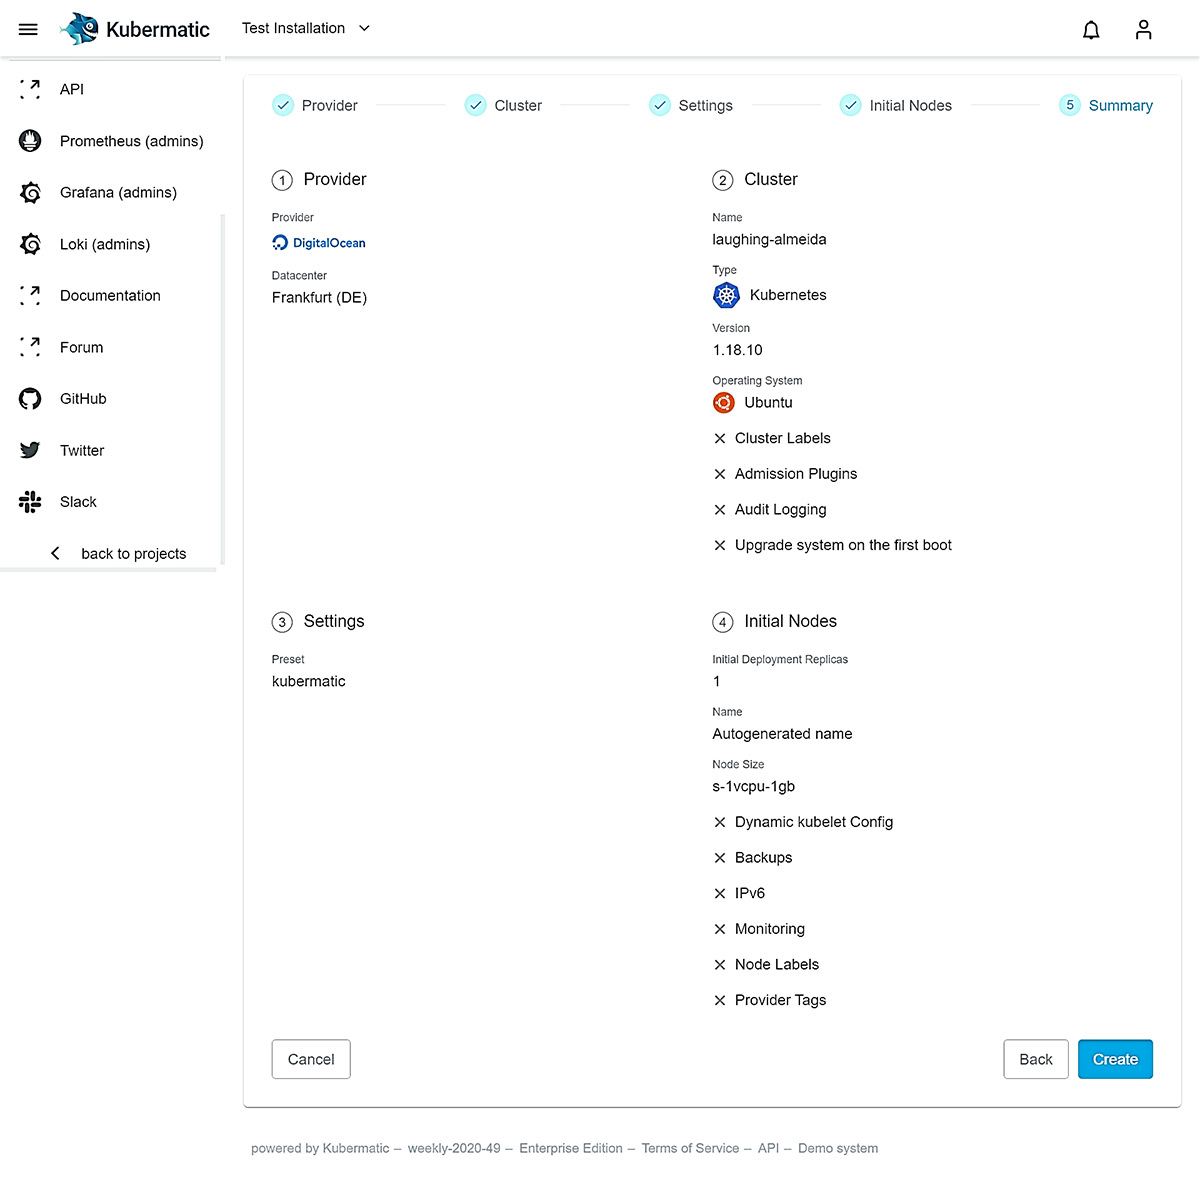
Step 6: Check whether all your configuration settings are correct and create your cluster!
Manage a Cluster
Cluster overview: Using the navigation “Manage Cluster,” you can display your active clusters.
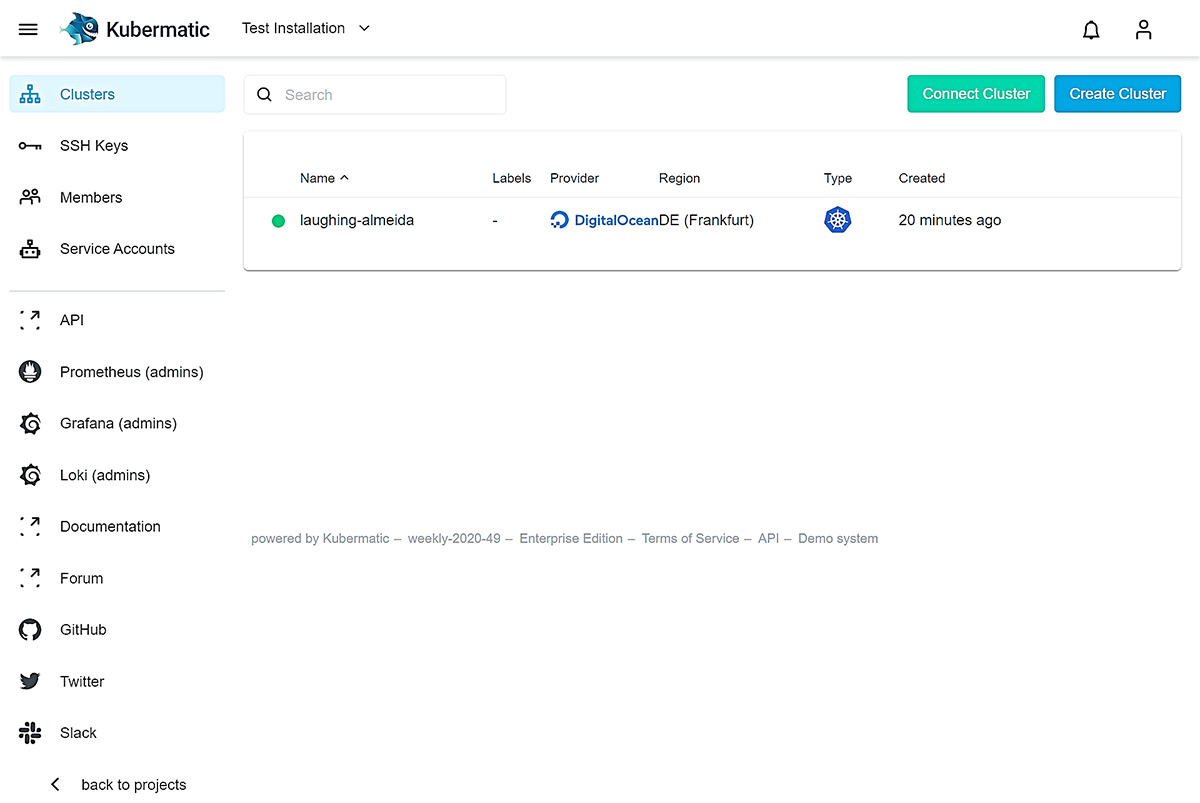
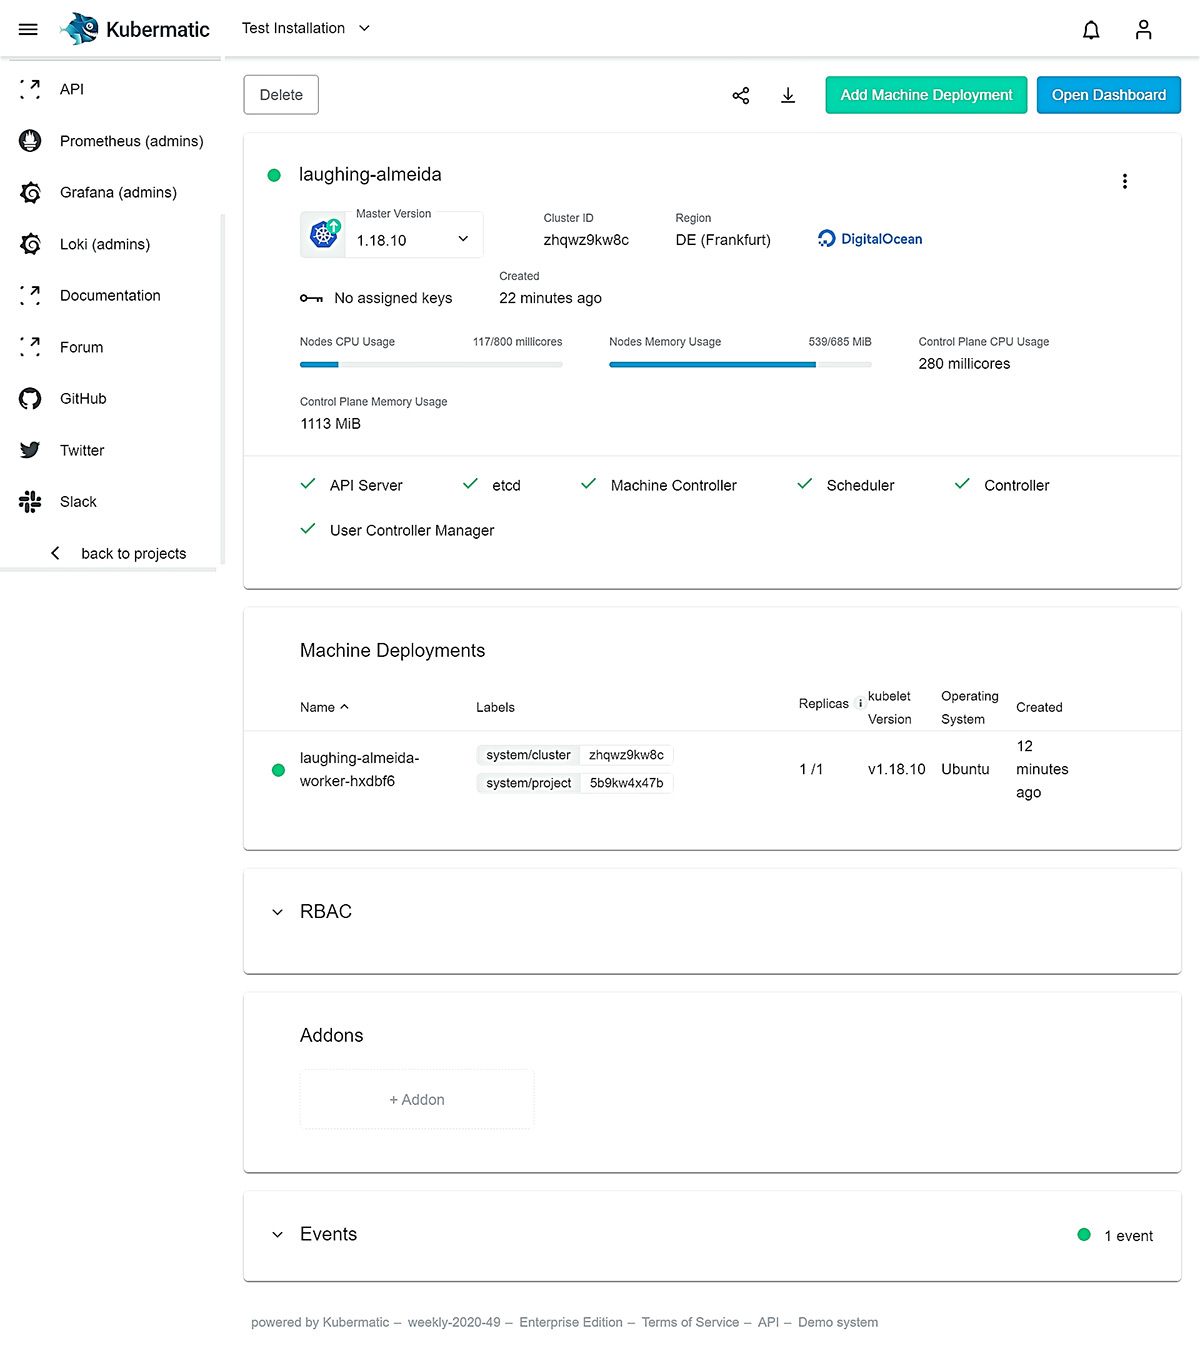
Basic cluster information: The dashboard provides you with all important cluster information. You can check the status of your master components and worker nodes.
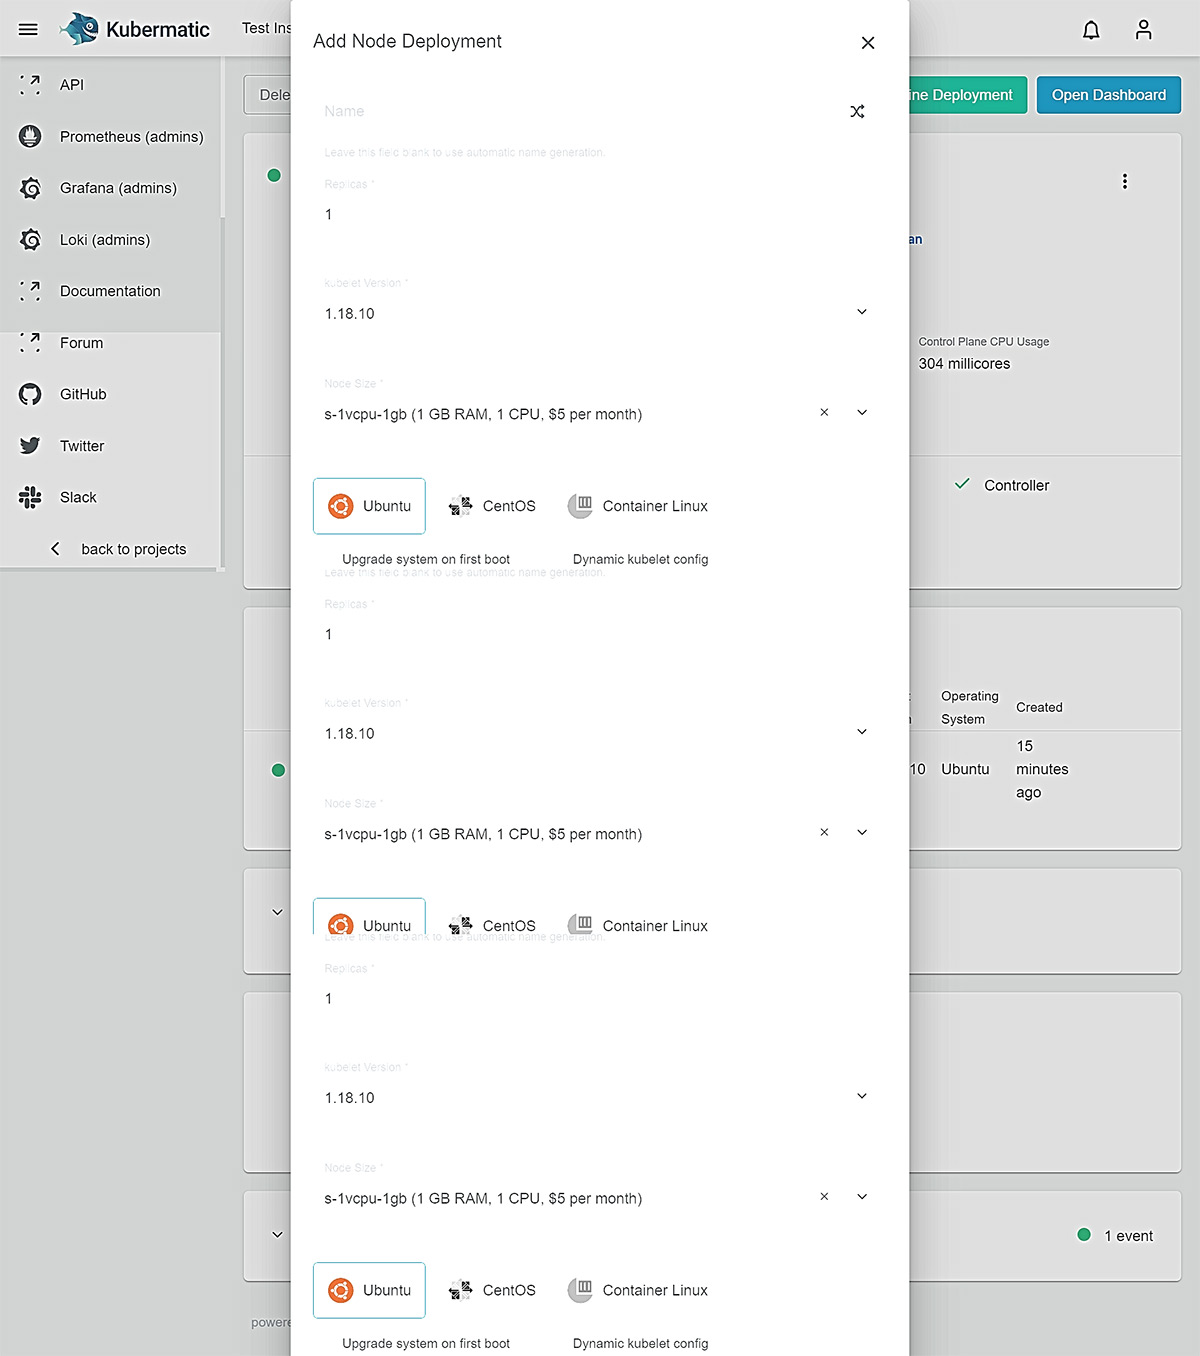
Adding new nodes to your cluster: You can easily extend your cluster with new worker nodes. Kubermatic Kubernetes Platform will automatically configure them and integrate them into your cluster.
Connect to the cluster: Kubermatic Kubernetes Platform automatically creates your cluster’s kubeconfig file. It can be downloaded using the icon button on the left of the “Add Node Deployment” button.
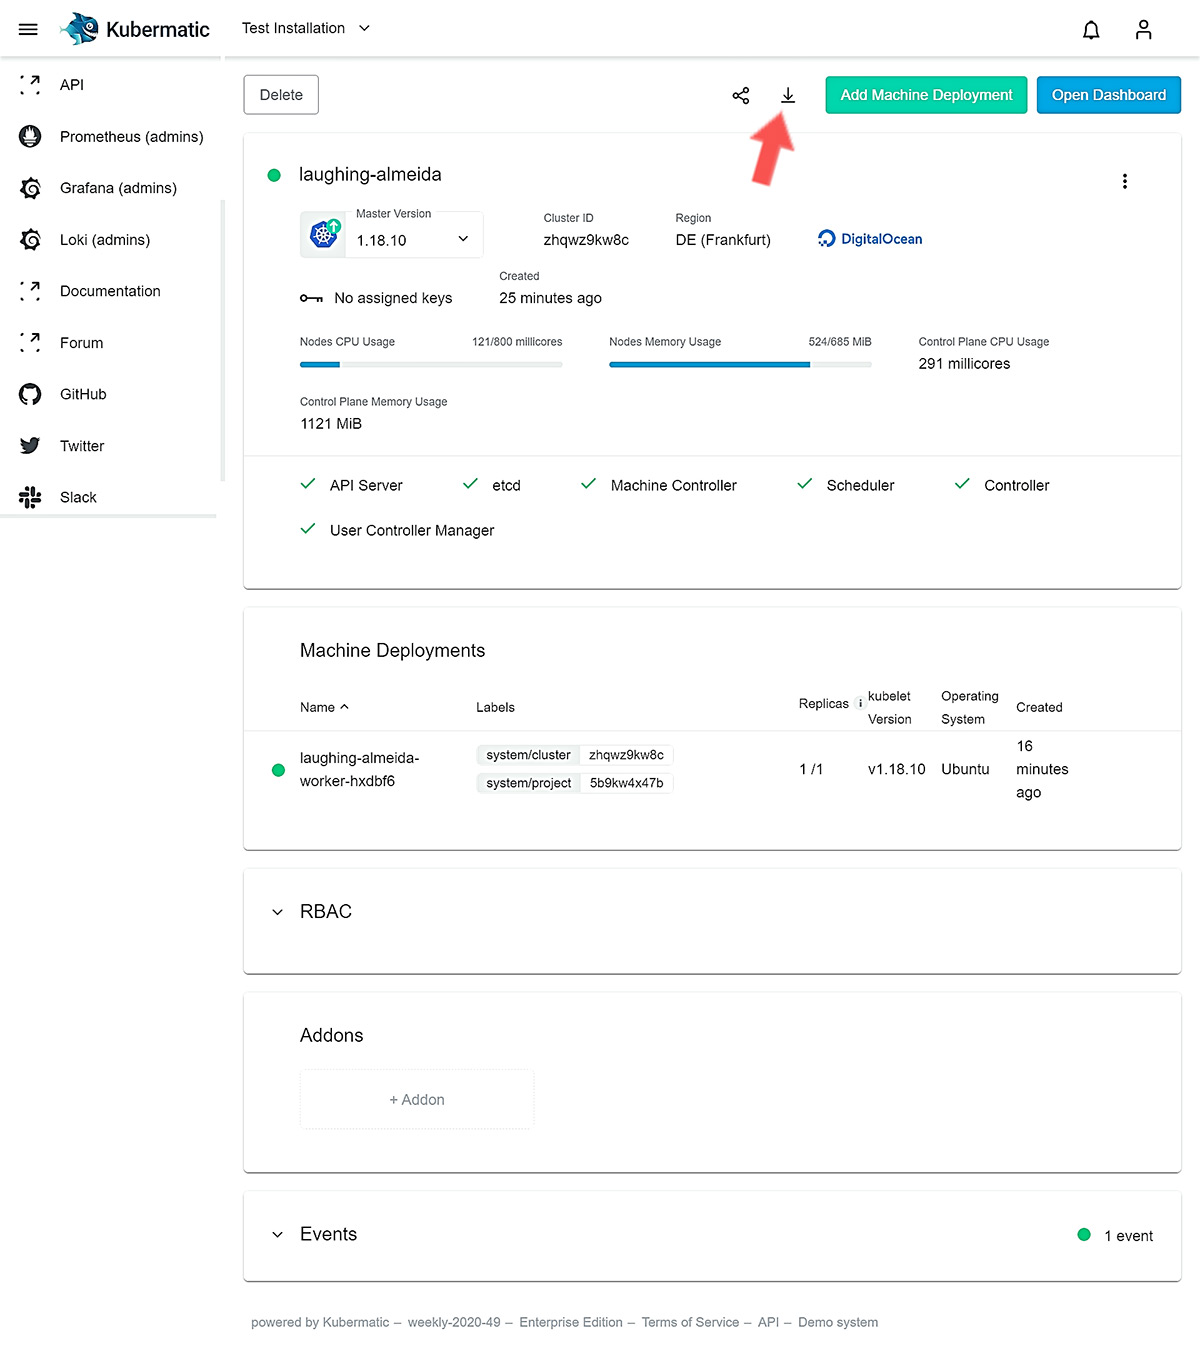
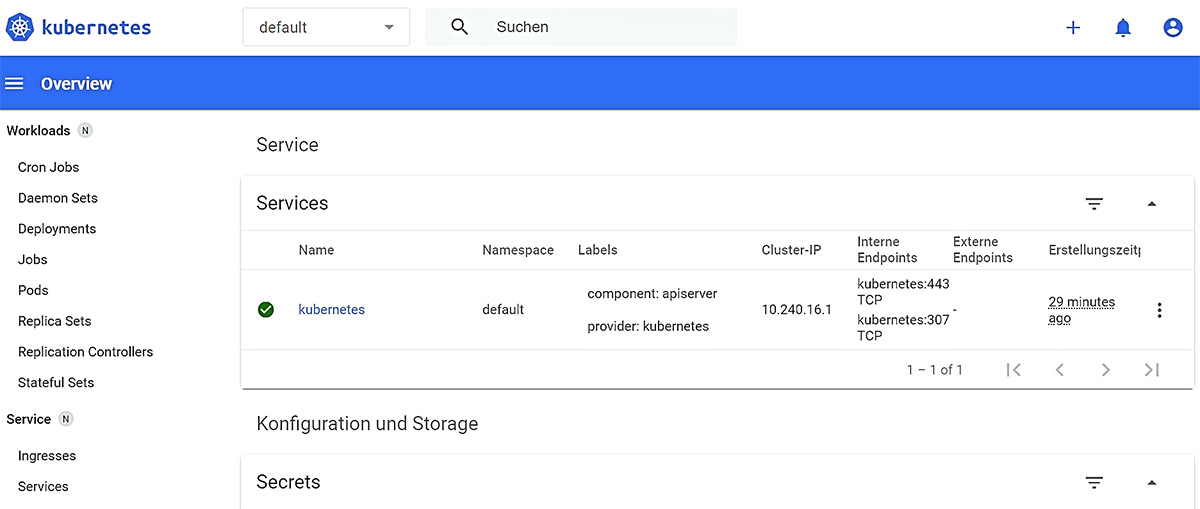
To connect to your cluster, configure the kubectl command line tool to use your kubeconfig file. You are now able to proxy into your cluster and run your favorite kubectl commands! You can also use the “Open Dashboard” button to access the Kubernetes Dashboard.
Give It a Try
These guidelines outline how to get started with Kubermatic Kubernetes Platform to increase your Kubernetes operations automation and scale efficiently. To try it out yourself, please contact us to request your personal demo.
Where to learn more:
- Visit our product page
- Watch the demo: Automate Your Clusters Across Multi-Cloud with KKP
- Find KKP on Github

