


Following our two blog posts on Getting Started with Kubermatic Kubernetes Platform: Automated Multi-Cluster Kubernetes Lifecycle Management and Deploying a Kubernetes Cluster with Kubeone, now, we will take you on a deep dive on how to install Kubermatic Kubernetes Platform (KKP) on an existing Kubernetes cluster in the third and last part of this series.
In our previous blog posts, you have already learned about how KKP provides full lifecycle management for thousands of Kubernetes clusters with automated deployments, upgrades, and policy compliance across any infrastructure. Based on this, you have gained insights into using KubeOne to create the initial cluster needed for setting up KKP.
In this third part, you will learn how to install Kubermatic Kubernetes Platform on an existing Kubernetes cluster by covering the topics below:
- Understand the KKP Architecture
- Install Kubermatic Community Edition (CE) on AWS
- Set up Seed cluster
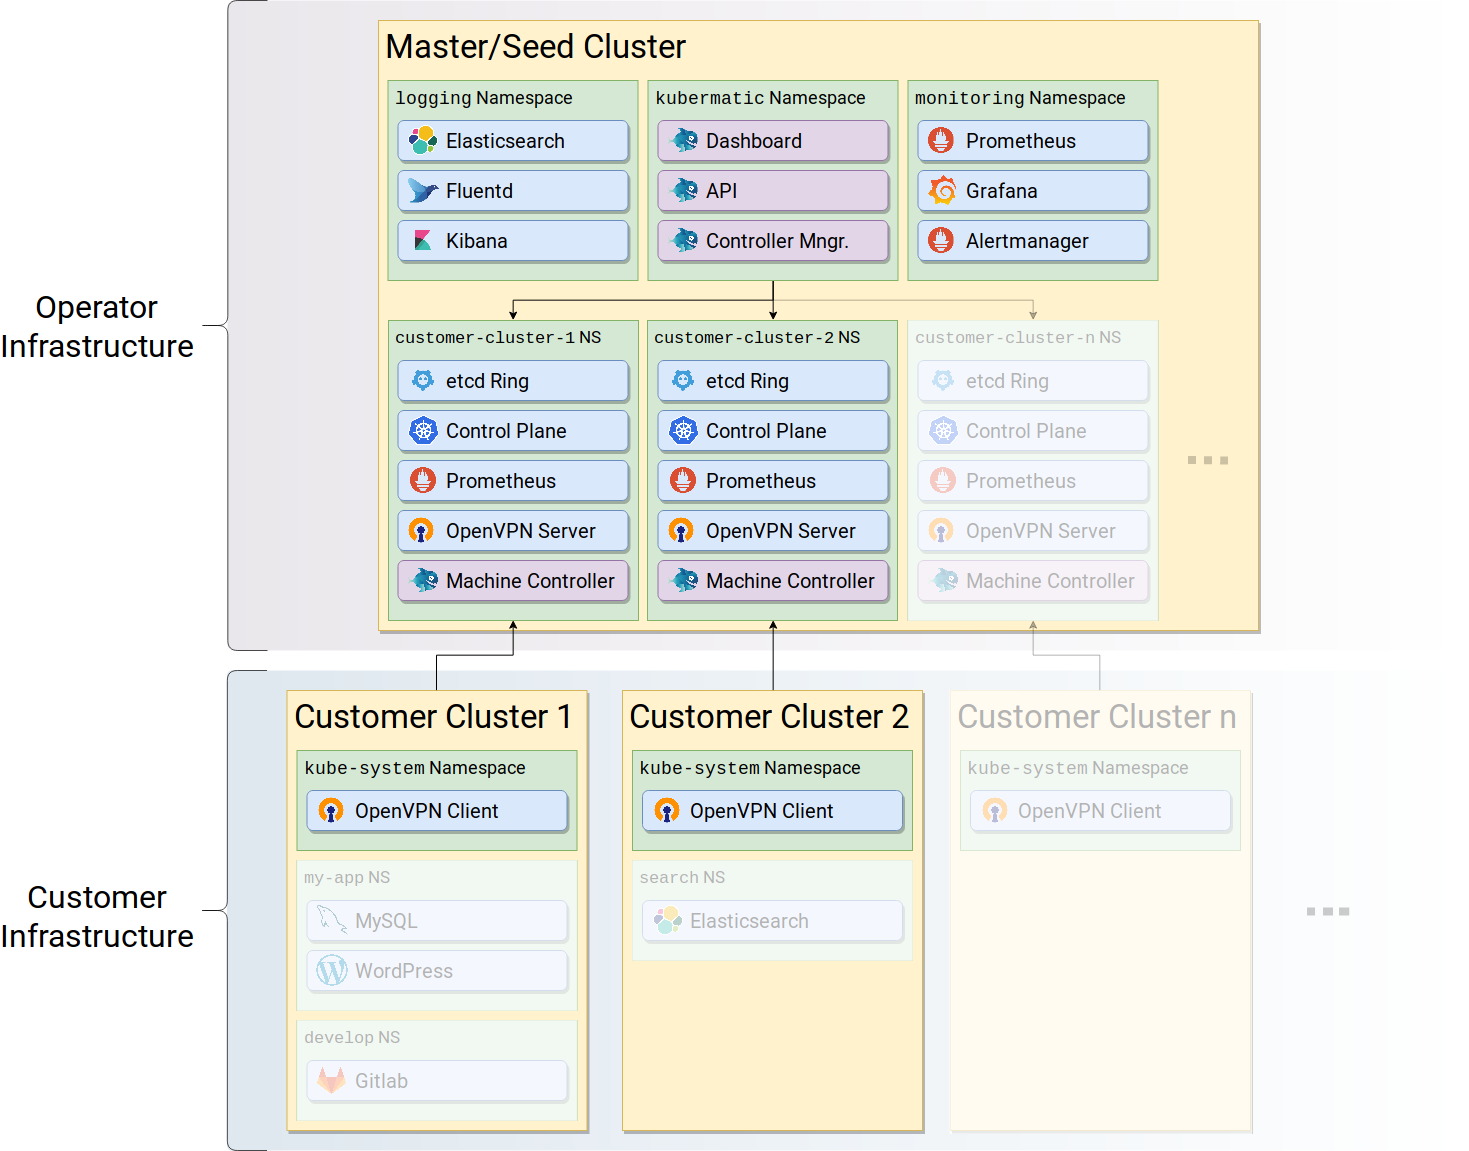
Understand the KKP Architecture
KKP architecture has two main components:
Master Cluster: This runs the main KKP namespace components that are considered as the main components for Kubermatic Dashboard, such as Kubermatic API and Kubermatic controller manager.
Seed Cluster: This runs the control plane of the Kubernetes such as API server, scheduler, machine controller, etc.
Generally, the KKP architecture supports large-scale multi-cloud deployment of Kubernetes clusters where the master cluster, the seed clusters, and the customer clusters can all be deployed in a different region.
Installing Kubermatic Kubernetes Platform Community Edition (CE) on AWS
Kubermatic Kubernetes Platform Community Edition (CE) is an open-source enterprise software that automates Kubernetes operations across all infrastructure in one single UI.
For setting up a KKP CE master cluster, we can use the following:
The GitHub repo where we’ll find a script
generate.shthat will further create three files, such asKubermatic.yaml,seed.yaml, andvalues.yaml.The official Kubermatic installation documentation where we can find the two links:
- Install Kubermatic Kubernetes Platform CE, and
- Add Seed Cluster for CE
Before installing KKP, we will need to ensure:
- Kubernetes cluster meets the minimal requirements
- Kubectl and Helm are installed locally
- Kubeconfig file is at hand
Download the tarball that contains the Kubermatic installer and the required Helm charts for the underlying OS with the below commands:
# For latest version:
VERSION=$(curl -w '%{url_effective}' -I -L -s -S https://github.com/kubermatic/kubermatic/releases/latest -o /dev/null | sed -e 's|.*/v||')
# For specific version set it explicitly:
# VERSION=2.15.x
wget https://github.com/kubermatic/kubermatic/releases/download/v${VERSION}/kubermatic-ce-v${VERSION}-linux-amd64.tar.gz
tar -xzvf kubermatic-ce-v${VERSION}-linux-amd64.tar.gz
KKP installation requires two important files, which are:
values.yaml: This is used to configure several Helm charts.kubermatic.yaml: Instance of the KubermaticConfiguration CRD and is configured by KKP itself.
In KKP, a custom storage class is used for the volumes that are created for user clusters. The class, Kubermatic-fast, must be created before the installation. The installer can also create an SSD-based storage class automatically or copy the default StorageClass. However, the latter is not recommended if the default class is not an SSD-based class. You can read more on StorageClass in our Kubernetes 101 series blog post.
The essential items to configure are:
- The base domain under which KKP shall be accessible (e.g.,
kubermatic.example.com). - The certificate issuer: KKP requires that its dashboard and Dex are only accessible via HTTPS, so a certificate is required. By default, cert-manager is used, but you have to choose between the production or staging “Let’s Encrypt services” (if in doubt, choose the production server).
- For proper authentication, shared secrets must be configured between Dex and KKP. Likewise, Dex uses yet another random secret to encrypt cookies stored in the users’ browsers. The secret must be generated twice; the first one will be the issuerCookieKey field’s value, while the second one will be assigned to the serviceAccountKey field in the kubermatic.yaml manifest file. Finally, on configuration, the kubermatic client secret value configured in the values.yaml must be the same as the value of the issuerClientSecret field in the kubermatic.yaml. These guidelines are specified in the source codes as comments.
The secret keys mentioned above can be generated using any password generator or on the shell using:
cat /dev/urandom | tr -dc A-Za-z0-9 | head -c32. On MacOS, use brew install gnu-tar and cat /dev/urandom | gtr -dc A-Za-z0-9 | head -c32.
Once the installation files are ready, we can run the installer that will validate all files and install the required components into the cluster by running the following commands on a terminal:
./kubermatic-installer deploy \
  --config kubermatic.yaml \
  --helm-values values.yaml \
  --storageclass aws
NOTE: Ensure that the downloaded file names are the same as the name of the config and helm-values yaml files. If this is not the case, make a copy of the files and rename it as desired, in this case, to kubermatic.yaml and values.yaml.
If everything works fine, the output should look like below:
INFO[13:03:33]    📝 Applying Kubermatic Configuration…

INFO[13:03:33]    ✅ Success.

INFO[13:03:33]    📡 Determining DNS settings…

INFO[13:03:33]       The main LoadBalancer is ready.

INFO[13:03:33]

INFO[13:03:33]       Service: nginx-ingress-controller / nginx-ingress-controller

INFO[13:03:33]       Ingress via hostname: EXAMPLEEXAMPLEEXAMPLEEXAMPLE-EXAMPLE.eu-central-1.elb.amazonaws.com

INFO[13:03:33]

INFO[13:03:33]       Please ensure your DNS settings for "kubermatic.example.com" include the following records:

INFO[13:03:33]

INFO[13:03:33]       kubermatic.example.com.    IN  CNAME  EXAMPLEEXAMPLEEXAMPLEEXAMPLE-EXAMPLE.eu-central-1.elb.amazonaws.com.

INFO[13:03:33]       *.kubermatic.example.com.  IN  CNAME  EXAMPLEEXAMPLEEXAMPLEEXAMPLE-EXAMPLE.eu-central-1.elb.amazonaws.com.

INFO[13:03:33]

INFO[13:03:33]    🛬 Installation completed successfully. ✌
The installer will install the following components:
- Nginx-ingress-controller: Used to access the KKP Dashboard
- Cert-manager: Responsible for the certificate generation
- Oauth: Responsible for authentication and authorisation
- Kubermatic Operator chart: Responsible for deploying Kubermatic pods and components required to make Kubernetes work
- SSD StorageClass: To store etcd clusters data for every user clusters
Setting Up Master Cluster
Once all the components are installed, a DNS record must be pointed to the domain name using either the internal or external (LoadBalancer) IP address, depending on your setup. The DNS record will be managed by the cloud service provider, such as Route53, in the AWS environment. You can read more on how to create DNS records on AWS cloud provider in the KKP documentation.
You can get the external IP or FQDN using the below command to connect the hostname with the domain (kubermatic.example.com) name:
$ kubectl get services –n nginx-ingress-controller
Once the DNS record has been created and pointed to the right domain, a certificate will be automatically generated by “Let’s encrypt for us”. Use kubectl get command to view the status of the Pods and the generated certificate in the Kubermatic namespace. All the Pods in the Kubermatic namespace must be running, while the certificate status output’s “Ready” column must be in a “True” state if everything works correctly. However, if any of the Pod is not running or the certificate is in a “False” state, you can debug it with any but not limited to these steps:
- Check the status and details of the Pods and certificates
- Check the logs of the Pods
- Check the DNS record configuration to be sure that it is pointing to the right domain
- Check the domain name
- Check the external IP address used for the configuration of the DNS record
To check the status of the Pods:
$ kubectl get pods -n kubermatic
NAME                                                  READY   STATUS    RESTARTS     AGE

kubermatic-api-7db9999755-mznzt                       1/1     Running     0          53m
kubermatic-api-7db9999755-shdbv                       1/1     Running     0        3h56m
kubermatic-dashboard-ff7659899-mphkz                  1/1     Running     0          21m
kubermatic-dashboard-ff7659899-tnl2w                  1/1     Running     0          19m
kubermatic-master-controller-manager-7d9c95c8dd-n2d6m 1/1     Running     0        3h56m
kubermatic-operator-784c5bc74b-ggthx                  1/1     Running     0          54m
To check the status of the certificate:
$ kubectl get certificates kubermatic-tls -n kubermatic
NAME              READY   SECRET           AGE
kubermatic-tls    True    kubermatic-tls   91m
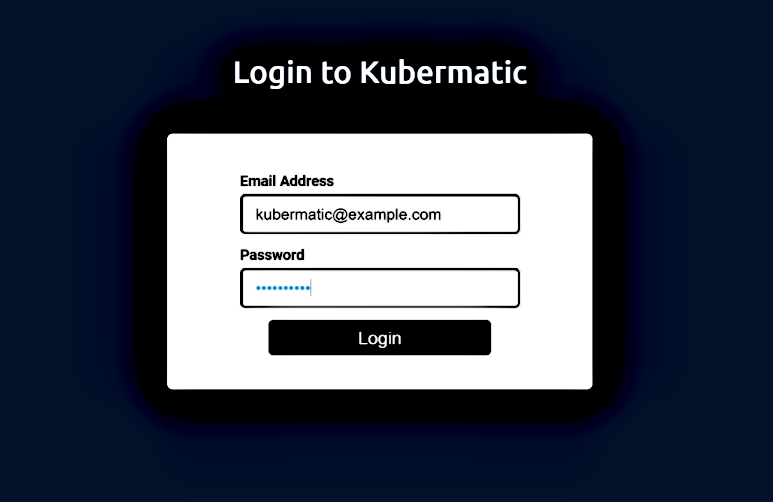
Now that the Pods are running and the certificate is in the “True” state, you can validate that everything works correctly by accessing the KKP Dashboard using the domain name; in this example, https://kubermatic.example.com/ and login with the static Email and password declared in the values.yaml.
Setting Up Seed Cluster
Once the master installation is completed, we can now install the Seed cluster. Seed cluster installation requires the installation of the Seed CRD file. This file defines where the user clusters worker’s nodes will be deployed.
The configuration will look like this:
apiVersion: v1
kind: Secret
metadata:
  name: kubeconfig-cluster-example
  namespace: kubermatic
type: Opaque
data:
  # You can use `base64 -w0 my-kubeconfig-file` to encode the
  # kubeconfig properly for inserting into this Secret.
  kubeconfig: <base64 encoded kubeconfig>
---
apiVersion: kubermatic.k8s.io/v1
kind: Seed
metadata:
  name: kubermatic
  namespace: kubermatic
spec:
  # these two fields are only informational
  country: FR
  location: Paris
  # List of datacenters where this seed cluster is allowed to create clusters in
  # In this example, the user cluster will be deployed in eu-central-1 on AWS.
  datacenters:
    aws-eu-central-1a:
      country: DE
      location: EU (Frankfurt)
      spec:
        aws:
          images: null
          region: eu-central-1
        enforceAuditLogging: false
        enforcePodSecurityPolicy: false
  # reference to the kubeconfig to use when connecting to this seed cluster
  kubeconfig:
    name: kubeconfig-cluster-example
    namespace: kubermatic
Use $ kubectl apply -f seed.yaml to apply the configuration. Once applied, the Kubermatic operator will start reconciling and install the required components. One of the components will be a nodeport-proxy that is dedicated to Load Balancing (LB) traffic to the right Kubermatic seed cluster. The external IP of the nodeport-proxy will be used to configure the DNS record for the seed cluster. You can access the seed cluster dashboard using the domain name configured in the DNS record and the static Email and password.
Setting Up User Cluster
Once the Seed installation is done, we can move to the user cluster installation. After login into Kubermatic, we can create a user cluster. Read more on the steps involved in our previous blog post on how to get started with KKP part 1.
Wrap Up
Kubermatic Kubernetes Platform Community Edition is a free tool available under the Apache License v2.0. It can be installed and configured on all major cloud providers such as AWS, Microsoft Azure, GCP, Digital Ocean, OVH, etc. After installing on any of the public clouds, you can further install a monitoring stack to gain metrics and alerting, and a logging stack to collect cluster-wide metrics in a central place.
We can take regular backups of user clusters by snapshotting the etcd of each cluster, and these backups are stored locally by default but can be reconfigured with any compatible S3 storage of AWS.
Where to Learn More
- Visit our product page
- Watch the demo: Automate Your Clusters Across Multi-Cloud with Kubermatic Kubernetes Platform
- Watch the recordings of our webinar series: Getting Started With Kubermatic Kubernetes Platform

