


Kubernetes as a Container Orchestration Tool
In our last post Getting Started With Containers, we discussed the basic terms, concepts and tools that are associated with containers. It is time to take a step further by diving into Kubernetes as a container orchestration tool. I will explain step by step how Kubernetes works and how to deploy an application to Kubernetes.
What is Kubernetes
Kubernetes, also known as K8s, is an open-source container orchestration tool originally developed by Google Engineers for automating container application deployment, scaling, load balancing and management. Currently, Kubernetes is being maintained by the Cloud Native Computing Foundation (CNCF).
The Background and Ecosystem
The history: “Kubernetes (κυβερνήτης, Greek for “helmsman” or “pilot”) was founded by Joe Beda, Brendan Burns, and Craig McLuckie. They were joined by other Google engineers including Brian Grant and Tim Hockin and was first announced by Google in mid-2014. There is a significant influence on its development and design by Google’s Borg system, and many of the top contributors to the project previously worked on Borg. The original codename for Kubernetes within Google was Project Seven of Nine, a reference to a Star Trek character of the same name that is a “friendlier” Borg. The seven spokes on the wheel of the Kubernetes logo are a reference to that codename. The original Borg project was written entirely in C++, but the rewritten Kubernetes system is implemented in Go Programming Language.
The first version of Kubernetes (v1.0) was released on July 21, 2015. Along with this release, Google and the Linux Foundation entered into a partnership to form the Cloud Native Computing Foundation (CNCF) and offered Kubernetes as a seed technology. On March 6, 2018, Kubernetes Project reached ninth place in commits at GitHub, and second place in authors and issues to the Linux kernel".
Kubernetes Ecosystem
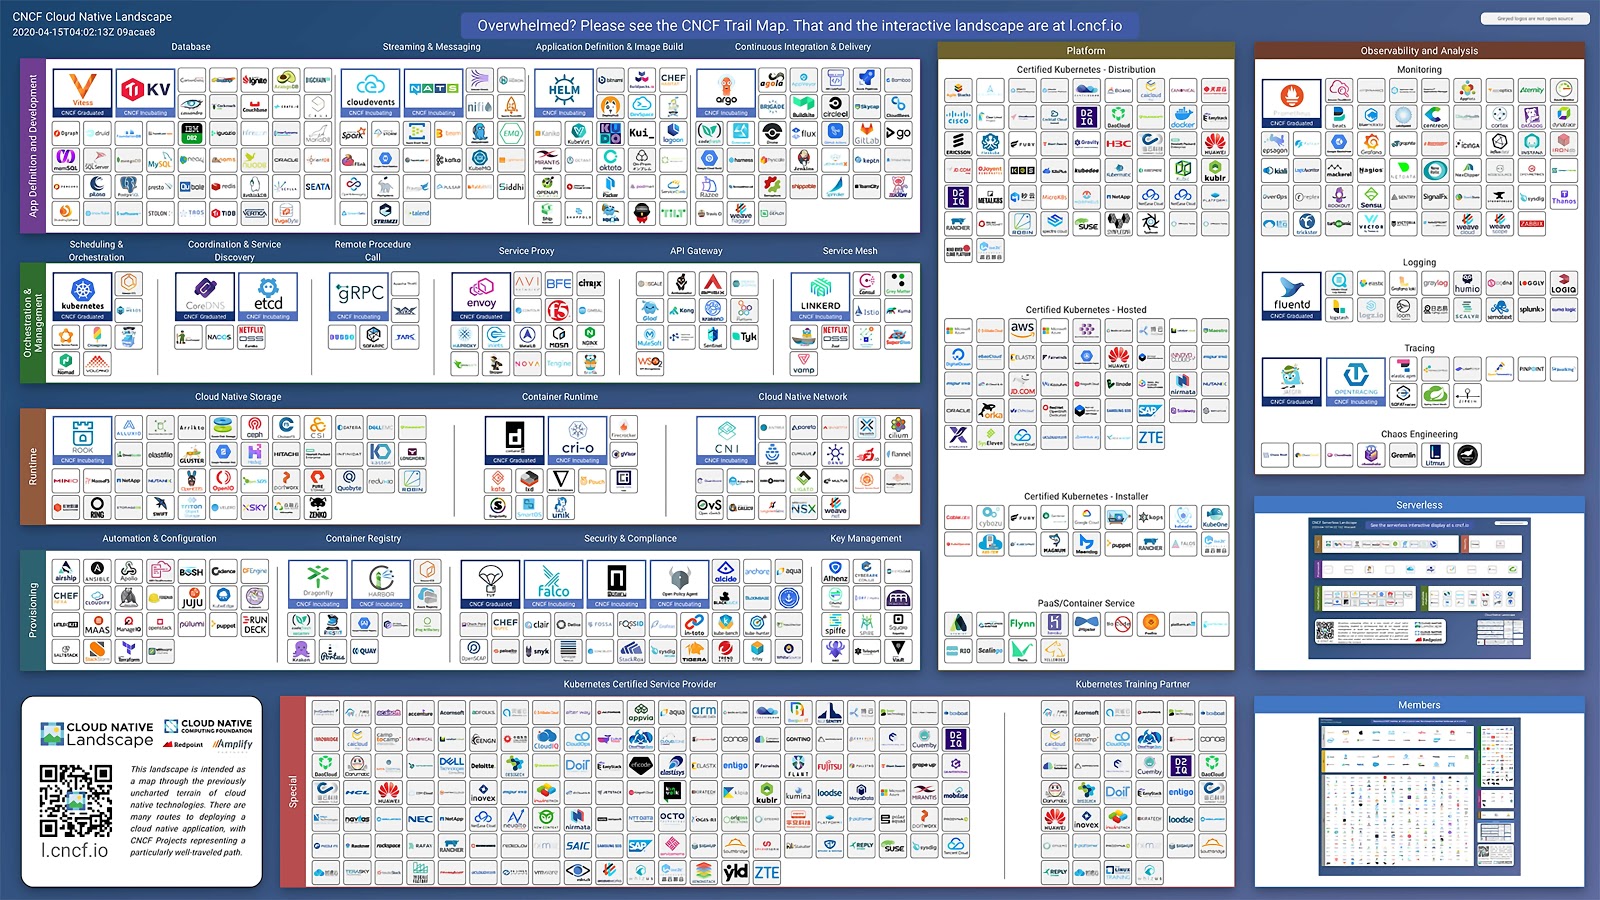
Below is the graphical representation of the Kubernetes Ecosystem in May 2020. It is a recommended path through the cloud-native landscape and provides a comprehensive overview of cloud native technologies and projects over the entire stack, from provisioning and runtimes to orchestration, and app definition and development. Status quo, it comprises 1,390 cards with a total of 2,208,407 stars, market cap of $15.5T and funding of $65.42B.
KUBERNETES ECOSYSTEM SCHEMATICS
Kubernetes Features
Kubernetes has the following features:
- Service discovery and load balancing
- Self-healing
- Storage orchestration
- Automatic rollout and rollback
- Secret and configuration management
- Horizontal scaling
- Batch execution
- Automatic Bin packing
Kubernetes Cluster, Master and Worker Nodes
What is a Cluster?
A cluster is a set of nodes grouped and managed by the master’s node. One of the advantages is the ability to have access to applications through the other nodes in case one of the nodes failed. Also, the ability to share load and resources across nodes makes the cluster healthier. There are different tools available to facilitate Kubernetes cluster deployment and management including i.a. Google Container Engine for GCP, EKS for AWS or our Kubermatic Kubernetes Platform that works for any on-prem, cloud, edge, or IoT environment.
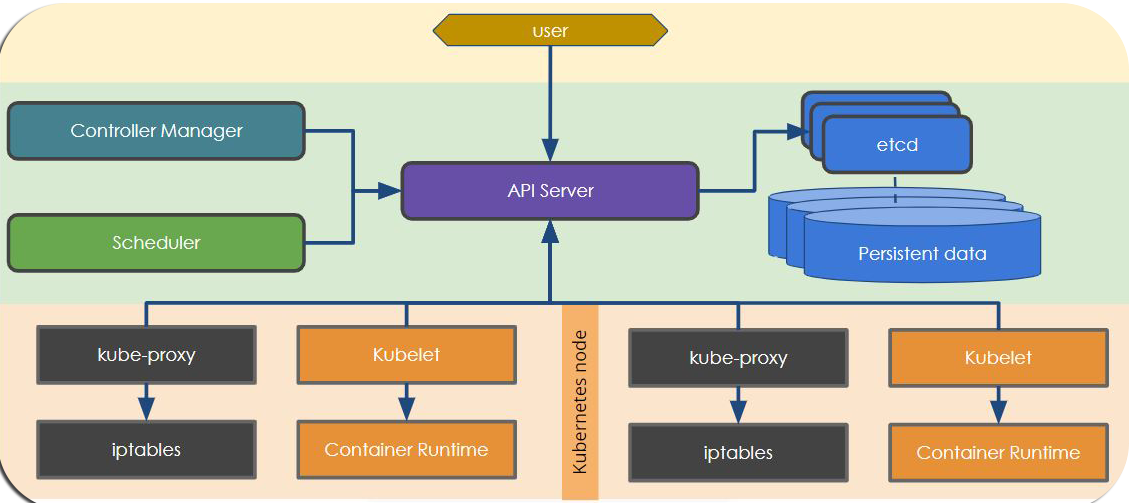
What is a Master Node?
The master node is the node that controls, monitors, plans and manages worker’s nodes, and also performs the administrative tasks. It uses the below components to execute the tasks effectively.
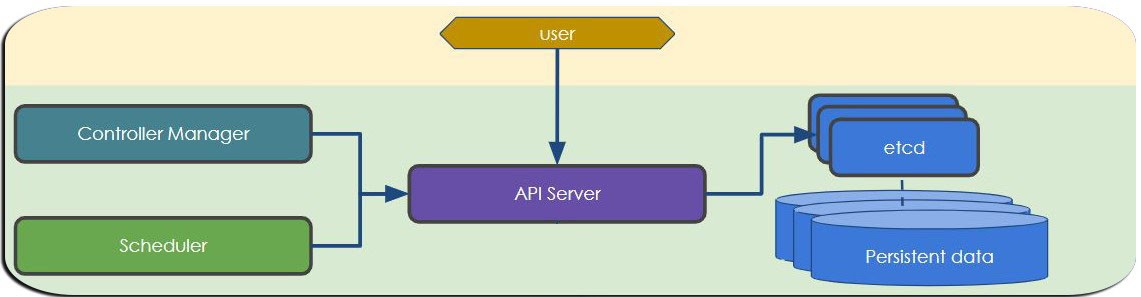
What is a Worker Node?
A worker node, which can be referred to as the slave node, is the node that executes the tasks assigned by the master’s node with the help of kubelet. It consists of pods, containers and Kube-proxy, which is used to access the external world.
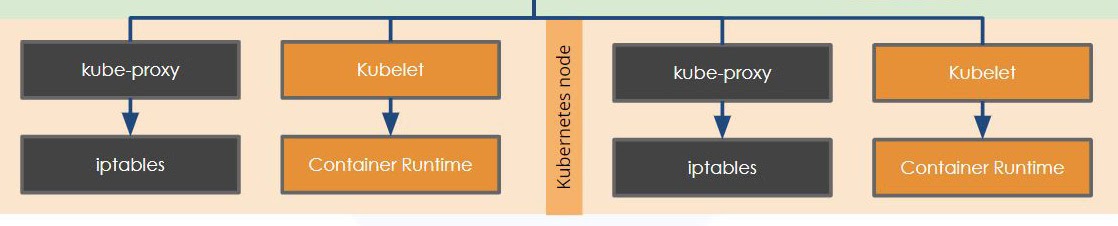
Complete Workflow
Kubernetes Declarative vs Imperative
Kubernetes can be orchestrated in two ways which can either be declarative or imperative. What does this mean?
Imperative Mode: This approach which is used in development environments is the easiest and fastest way of deploying to Kubernetes using command-line. This type of approach operates on live objects and does not require configuration files but it is used on the command line passed as flags e.g.
kubectl run <app name>, kubectl create <app name>, kubectl delete <app name>
etc.
Declarative Mode: This mode is in contrast to imperative mode, which entails giving step by step instructions declared in a configuration (yaml) file that is specified in a directory and use
kubectl apply or update <file name>
command to perform the deployment. This approach is used in production environments.
The Hello K8s Application
Now, it is time to put together everything we have been talking about by creating your first Kubernetes application. Follow the below steps to deploy your containerised web application. But wait…..first, we need to deploy a Kubernetes cluster. You can easily create a cluster on any environment with KubeOne. Check the Getting Started for guide and instructions. As an alternative, Minikube, Katacoda or Kubernetes playgrounds can also be used for our practising purpose.
Steps:
I assume that you already have a running Kubernetes cluster and the kubectl command-line tool. You can check your cluster by using the command:
$ kubectl version
Client Version: version.Info{Major:"1", Minor:"14", GitVersion:"v1.14.0",
GitCommit:"641856db18352033a0d96dbc99153fa3b27298e5", GitTreeState:"clean", BuildDate:"2019-03-25T15:53:57Z", GoVersion:"go1.12.1", Compiler:"gc", Platform:"linux/amd64"}

Server Version: version.Info{Major:"1", Minor:"14", GitVersion:"v1.14.0",
GitCommit:"641856db18352033a0d96dbc99153fa3b27298e5", GitTreeState:"clean", BuildDate:"2019-
03-25T15:45:25Z", GoVersion:"go1.12.1", Compiler:"gc", Platform:"linux/amd64"}
STEP 1:
Run nginx pod using kubectl
$kubectl run --image=nginx nginx-app --port=80--env="DOMAIN=cluster"
STEP 2:
Expose the port
$kubectl expose deployment nginx-app --port=80--name=nginx-http --type=LoadBalancer
STEP 3:
Check if the container is running
$ kubectl get pods
STEP 4:
Get the external IP and port by running:
$ kubectl get service
The final output should look like the below image if everything works correctly.
$ kubectl get service
NAME         TYPE           CLUSTER-IP     EXTERNAL-IP    PORT(S)        AGE
kubernetes   ClusterIP      10.96.0.1      	 <none>       443/TCP        37m
nginx-http   LoadBalancer   10.110.1.201   172.17.0.25    80:30127/TCP   52s
This is it: You just got started with your very first application in Kubernetes! Congratulations and welcome to the cloud native family!
Short note: In case the external IP is in a pending state, leave it for a few minutes and run the same command again. Moreover, do not worry about some of the terms (LoadBalance, Pods, Service and deployment) used in the commands above, I will expatiate more on them as the series continues.
Introduction to Pods, Deployments and Replica sets
Next on our series are the Kubernetes resources which include pod, deployment and replicaset. We will be looking at the definition of these resources, features, functions and usage in Kubernetes.


